Unbeatable tic-tac-toe with Pygame - pt. 2
- Overview
- Goals
- Pygame basics
- Drawing objects
- User input
- Processing input
- Displaying game state
- Game loop
- Extras
- Conclusion
Overview
Tic-tac-toe is a game for 2 players, X and O, who take turns selecting positions on a 3x3 board. To win, one player must manage to place three of their marks in a row, either horizontally, vertically, or diagonally.
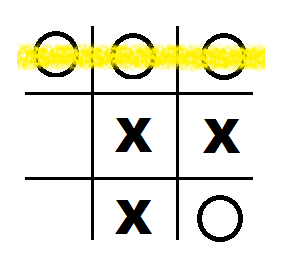 In this example, player O has won, as they have marked 3 of their symbols along the top row.
Goals
In the previous post, I implemented the tic-tac-toe game in a single class, TicTacToe(). I also programmed an AI with the logic for playing a perfect game of tic-tac-toe, so the user playing against the computer can do no better than draw, and that logic is held in TicTacToe.make_computer_move().
In this post, I’ll describe how I leveraged the Pygame package to provide an interface between the user and the AI.
Tic-tac-toe game
Before going further, let’s initialize the class we discussed in pt. 1, TicTacToe, from BaseGame.py.
from BaseGame import TicTacToe
game = TicTacToe()
We’ll use this to track and update the board state, as well as telling us when the game ends, and who the winner is (or whether it’s a draw).
Pygame basics
The first step to making the UI is to import the pygame package, and initialize pygame.
import pygame
pygame.init()
Now this is done, we need to open a window for the program to run in. Here, I’m manually setting the screen height and width, then filling the entire screen with a solid white background.
SCREEN_WIDTH = 650
SCREEN_HEIGHT = 360

DISPLAYSURF = pygame.display.set_mode((SCREEN_WIDTH,SCREEN_HEIGHT))

WHITE = (255, 255, 255)
DISPLAYSURF.fill(WHITE)
Drawing objects
All we have right now is a blank canvas, so next we’ll need to draw, or “blit”, objects (perhaps representing characters, scenery, information, etc) onto the canvas.
Background
In my case for tic-tac-toe, I’m going to start by drawing a background of the 3x3 grid onto the white canvas. This tictactoe_background.jpg was lovingly crafted in MS paint, and looks like:
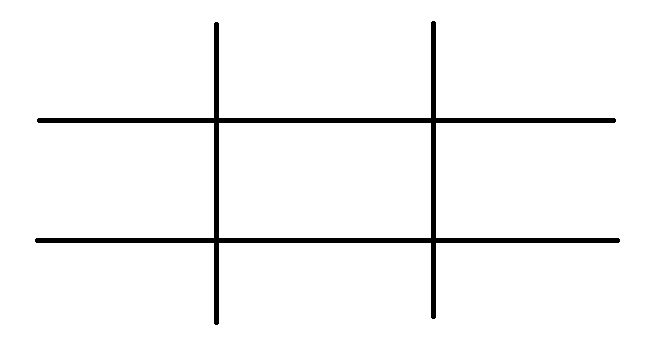
First, we have to create a pygame object to hold the image, called a Surface, which we will then “blit” onto the canvas background, DISPLAYSURF.
background = pygame.image.load("./assets/tictactoe_background.jpg")
DISPLAYSURF.blit(background, (0,0))
Note that we are calling DISPLAYSURF.blit(background, (0,0)) where tuple (0,0) indicates the (x,y) location we’d like to align the top left of the background Surface object to, relative to the top left of DISPLAYSURF. Passing (10,0) instead would move background down 10 pixels, while passing (0,10) instead would move background to the right 10 pixels.
So now, the pygame window would just look like: ![]()
Marked locations
Now we have the grid background, but need to fill in any marked locations with the appropriate symbol (X for the user, O for the AI). To do this, we’ll use what’s called a Sprite in pygame.
What’s a sprite? Basically, it’s just a class that represents some surface, at some location, with some attributes. The class is very versatile, as sprites can be easily updated & redrawn. For example, a single sprite could represent a running character, and during the “game loop” the character’s position (part of the Sprite object) would be updated, and the sprite would be redrawn at the new position.
In our tic-tac-toe game, I’ll use a single sprite to represent each location in the 3x3 grid that can be marked. Initially, the sprites will not be displayed, but once they are selected by either the player or the AI, then they will be updated with the appropriate image (either an X or O). I’ll extend the base pygame.sprite.Sprite class into my own block class:
class block(pygame.sprite.Sprite):
    def __init__(self, i):
        super().__init__()
        self.surf = pygame.Surface((100, 100))
        self.rect = self.surf.get_rect(topleft=((i//3)*SCREEN_WIDTH/3+50, 10+(i%3)*SCREEN_HEIGHT/3))
        self.i = i

    def display(self, user):
        if user==1:
            self.image = pygame.image.load("./assets/x.jpg")
        else:
            self.image = pygame.image.load("./assets/o.jpg")

sprites = [block(i) for i in range(9)]
sprites is now a list that holds 9 individual blocks. Each block.rect describes where, in a 3x3 grid, the block would be placed. Note that currently the blocks do not have background images, as block.display(user) has not been called. Also, they have not yet been drawn to the screen! They just exist in memory and are not visible. However, highlighting where they would be, the blocks are distributed approximately:
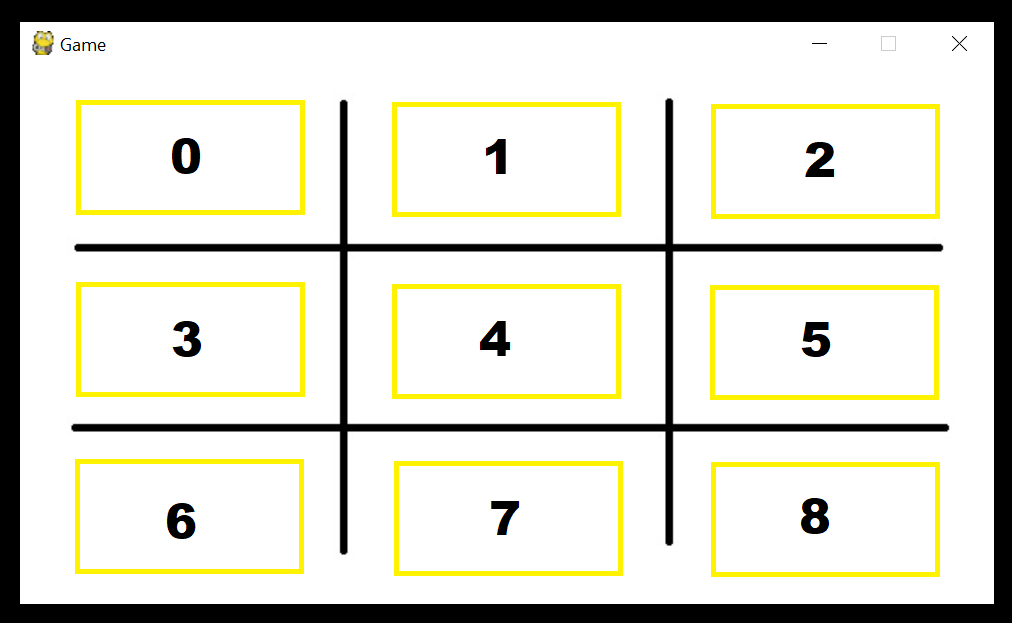
Note that each block also stores block.i, where i ranges from 0 through 8, indicating the “seed” with which that block was made.
User input
We’ve got all the objects we need, now it’s time to start the game and get user input.
I’ve designed the game so that the user always goes first, so they will be presented with a blank screen and have to click on the location they want to mark. Let’s imagine they click somewhere in the middle of the screen: 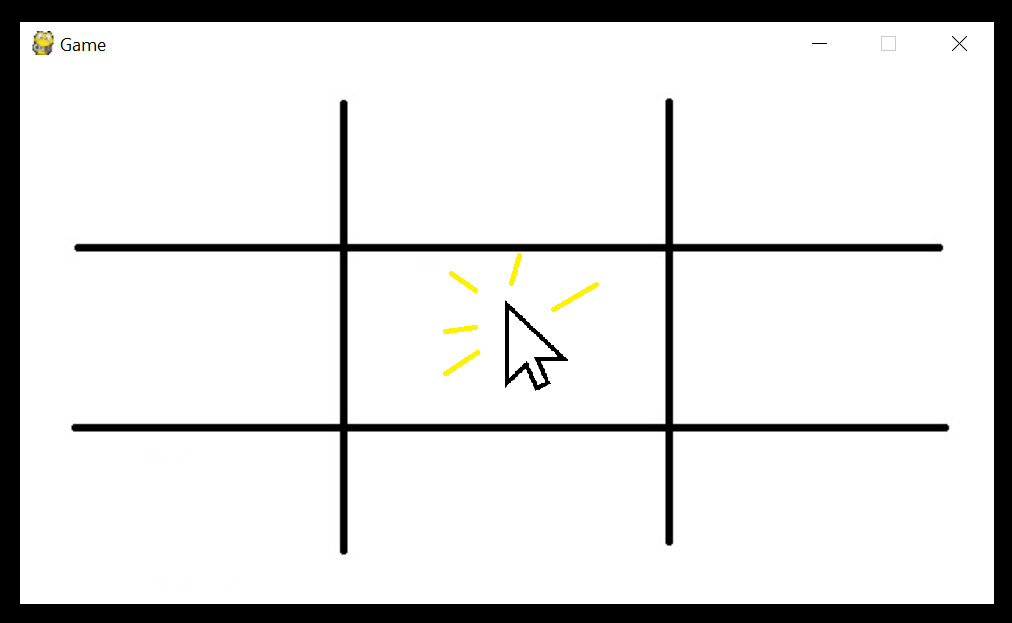
How can pygame catch this? Well, we constantly want to be checking for an event, which is a fancy way of saying a mouse click, button press, or joystick input of some sort.
These events come in a queue, accessed through pygame.event.get(), so we want to loop through this list, checking if any of the events are a down click (event.type == pygame.MOUSEBUTTONDOWN) of the left (event.button=1) mouse button.
for event in pygame.event.get():
    if event.type == pygame.MOUSEBUTTONDOWN and event.button == 1:
        # location of the click
        x,y = event.pos
From the event object, we can access the x,y coordinates where the event happened, and process the click.
Processing input
We now want to convert the x,y coordinates of the user input to a meaningful “move” on the tic-tac-toe board. Remember sprites, the list of block sprites from before? The Sprite class comes a function to determine if a collision has happened. We’ll leverage it by looping through our sprites, checking if any of them overlap with the user’s input.
However, even if the user’s input collides with one of the block sprites, we also need to check if that location is available. To do this, we’ll reference game.board, which stores the current board state, and check if that location is zero (has not been selected by a user prior to this point). If it’s unfilled, fill it, check whether the game has ended, and if not allow the computer to go next.
for sprite in sprites:
    if sprite.rect.collidepoint(x,y):
        if game.board[sprite.i//3, sprite.i%3]==0:
            # update the game board
            game.board[sprite.i//3, sprite.i%3] = 1

            # change the user so the computer goes next
            game.game_finished = game.is_game_finished()
            game.user *= -1
            break
So, taking it back to our example where the user clicks in the middle of the blank board:
This user input overlaps with sprite #4, so game.board will be updated to:
[[0, 0, 0],
 [0, 1, 0],
 [0, 0, 0]]
This indicates that only the center location has been selected, and that has been selected by the user, not the AI. We can call game.make_computer_move() to allow the AI to do it’s turn, then resume processing user input. Note the computer uses -1 to denote selected locations in game.board, so the new state would look like:
[[-1, 0, 0],
 [ 0, 1, 0],
 [ 0, 0, 0]]
Displaying game state
Now that the user has made their input, we need to display the results. In our example, we need to display that their click resulted in the middle location being filled, and that the AI selected the top left.
In pygame terms, we need to re-draw everything we want displayed, then update the display by calling pygame.display.update().
So what do we want displayed? First, the background image (the 3x3 grid). Then more importantly, we want any sprites that have been selected, with the appropriate image displayed.
To accomplish this, we’ll enumerate through game.board.flatten(), which will take us through each element in game.board and the range 0 through 8, which is coincidentally i, the index of our sprites.
If element!=0, then that location in game.board has been selected by either the player or the AI. We’ll select the appropriate sprite from the list sprites, update sprite to display the appropriate image (X if the user selected, O if the AI selected). This determination is made off of element, which will be 1 if the user made that selection, but -1 if the AI made it.
# update the board
DISPLAYSURF.blit(background, (0,0))
for i,element in enumerate(game.board.flatten()):
    if element!=0:
        sprite = sprites[i]

        # set whether the sprite is an X or O
        sprite.display(element)

        DISPLAYSURF.blit(sprite.image, sprite.rect)

pygame.display.update()
After updating the display, the screen now shows the user: 
Game loop
It’s time now to put all the pieces together into a loop. We have all the fundamental elements we need to run the game, and now simply need to repeatedly manage and update the game state, while watching for user input. Let’s build this now.
The game class I wrote maintains a game.game_finished boolean, indicating whether the game has ended (either due to a player winning, or a draw being reached). So while the game is not finished, we need to accept input and update the screen.
while not game.game_finished:
    if game.user==1:
        # ------- process inputs -------
        ...

    else:
        # ------- make computer move --------
        ...

    # ----------- update display --------------
    ...

pygame.display.quit()
pygame.quit()
This simply assembles all the pieces we’ve already discussed! After breaking out of the loop, we close the display window and the program itself.
Extras
Pygame is capable of handling much more complicated programs, and I have barely scratched the surface of what it can do. However, before calling it quits on this project, I also wanted to explore a little bit.
I set myself the additional challenge of letting the user repeatedly play games of tic-tac-toe, until they decided to stop, while updating them on their win/draw/lose record so far.
Repeatedly playing
To play multiple games, I need another loop, to repeatedly call the game loop! I start off the program with a variable called play, and run a new game as long as play is True.
play = True
while play:
    game = TicTacToe()
    # -------- game loop -----------
    ...
    play = keep_playing()

pygame.display.quit()
pygame.quit()
Note that I have moved closing the display to outside the new loop, and have a new function called keep_playing() that I’ll discuss momentarily.
Keeping score
I’d also like to keep track of the wins, draws, and losses the user experiences, as they play multiple games.
I’ll use a list, records, to keep track of 3 integers, representing the number of wins, draws, and losses for the user during this session, respectively.
Note the AI has been programmed to be unbeatable so it should be impossible for the user to win, but I’ve included this metric in the counter, just in case.
records is a global variable, so I’ll initialize all values to 0 outside the outer game loop. The game class tracks game.winner, which will be 1 if the user wins, -1 if the AI wins, and 0 if it is a draw, so I’ll use this value to increment the appropriate entry in records.
records = [0,0,0]
...

while play:
    # -------- inner game loop -----------
    ...
    records[game.winner*-1+1] += 1
    play = keep_playing()

pygame.display.quit()
pygame.quit()
Additional input
After the current game ends and the record has been updated, I need another input from the user, to indicate if they would like to play again. For this, I’m going to display other objects to give the user different information, including their current win/draw/lose record.
I’ll hold all this logic inside a keep_playing() function, and update the play variable after each game based on the result of this function.
I’m going to request the user press a button to play again, so I need to create a button from the pygame Rect class, so it can be colored in, and I can again use collidepoint(x,y) to determine if the user clicked on the button.
WHITE = (255, 255, 255)
GREEN = (0, 255, 0)
font_small = pygame.font.SysFont("Verdana", 20)

def keep_playing():
    # draw button and background
    DISPLAYSURF.fill(WHITE)

    button = Rect(SCREEN_WIDTH/2-150, SCREEN_HEIGHT/2-50, 300, 100)
    pygame.draw.rect(DISPLAYSURF, GREEN, button)

    text = font_small.render('Click here to play again!', True, BLACK)
    text_rect = text.get_rect(center=(SCREEN_WIDTH/2, SCREEN_HEIGHT/2))
    DISPLAYSURF.blit(text, text_rect)
    ...
What this does, simply, is display a very green box, approximately centered on the screen, with text on it, encouraging the user to click inside the box. It looks like this: 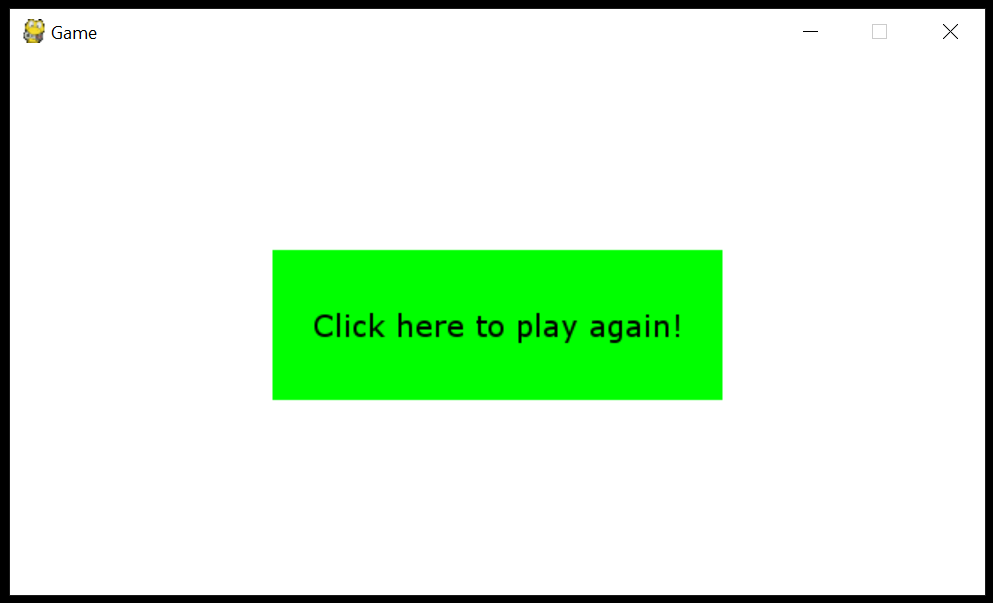
I’ll also write the current win/draw/loss record from records to the screen.
def keep_playing():
    ...

    # draw results
    DISPLAYSURF.blit(font_small.render('User wins: {}'.format(records[0]), True, BLACK),
                     (0, 0))
    DISPLAYSURF.blit(font_small.render('Ties: {}'.format(records[1]), True, BLACK),
                     (0, text_rect.height))
    DISPLAYSURF.blit(font_small.render('Computer wins: {}'.format(records[2]), True, BLACK),
                     (0, text_rect.height*2))
    ...
Now, (after a tie), the window would look like: 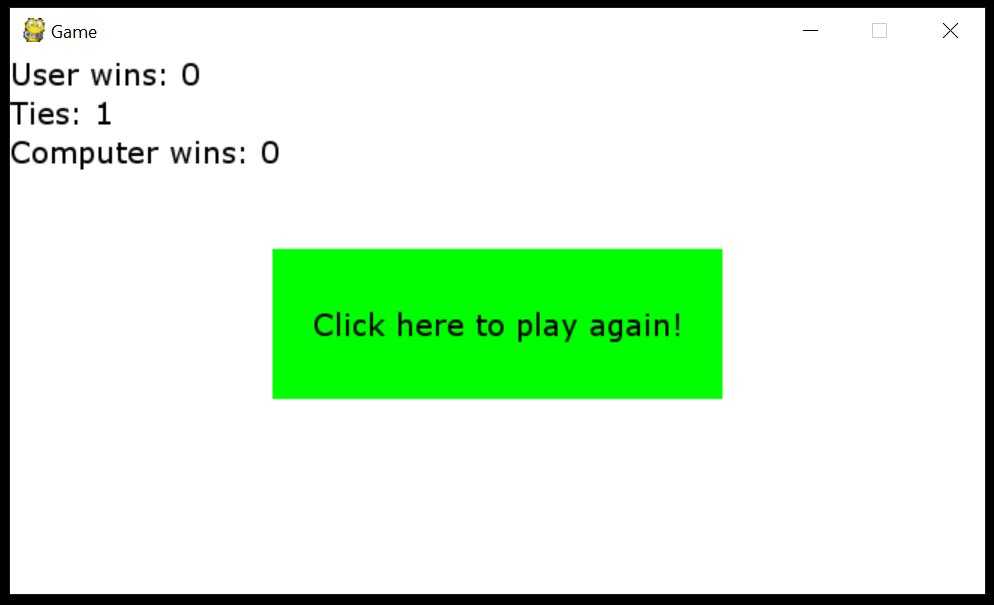
But wait! We still need to “listen” for user input, so that means another loop, watching for events. We’ll use the same logic as before, checking if the user’s right click collides with the button.
def keep_playing():
    # ------- update display -----
    ...

    while True:
        for event in pygame.event.get():
            if event.type == pygame.MOUSEBUTTONDOWN and event.button == 1:
                # location of the click
                x,y = event.pos

                if button.collidepoint(x,y):
                    return True
                else:
                    return False
Note there is no break out of the loop! Either the user clicks the button, where keep_playing() will return True, or they click outside the button, where keep_playing() will return False. Until the user clicks, the screen will keep waiting for input.
Conclusion
Now we have a fully-functioning, repeating tic-tac-toe game, against a competent opponent. I hope this provided an interesting, yet simple example of the types of things the pygame package allows you to do.
Code
Complete code can be found in my UI-examples git repository.
This section of the project relies on numpy and pygame.