Checklist web application using Flask
Overview
In this post, we’ll walk through the architecture of a Flask web application with the following main functionality:
- Supports multiple users via register/login/logout methods
- Displays upcoming tasks, organized by due date
- Allows users to mark tasks as complete
- Allows users to create/edit/delete tasks
- Supports recurring tasks
Flask basics
First off, let’s address the framework we’ll be using: Flask is a Python-based framework that can be used to develop web applications. It provides a lot of out-of-the-box functionality, and (along with Django) is one of the most popular frameworks for web applications in Python.
Let’s start by looking at the layout of a typical Flask project, and going over some vocabulary on how Flask interacts with the rest of the files. Later, we’ll dig in to the specifications for our checklist application.
+--
    --app.py
    --schema.sql
    +-- templates
        --index.html
        --greeting.html
        ...

    +-- static
        --styles.css
        ...
app.py
The application code is typically stored in a single file, and can be run using the command flask run. This command initializes app.py.
This code file holds the logic for building the website, how users can move between pages, what requests they can send, what data is returned, etc.
Database
Databases are not necessary to a Flask app - in our case, however, we want to be able to store data. I’ll be using sqlite3, which provides an interface between an application and a database.
Note that schema.sql is file with SQL commands, which will initialize our database (when needed). We will need to provide code in app.py to execute this file.
Templates
Now we get into the meat of the website - each template contains HTML to render a specific type of page. Flask is built on the Jinja2 template engine, which is a fancy way of saying we can use specific syntax in the HTML templates to interactively customize what is displayed to the end user, on the fly.
For example, in app.py:
from flask import render_template

def say_hello():
    return render_template('greeting.html', name="Jane")
This calls the template greeting.html, and provides a parameter name with value Jane.
In greeting.html, we could say:
<!DOCTYPE html>
<html lang="en">
    <body>
        <h4>Hello, {{name}}!</h4>
    </body>
</html>
Note the double curly braces - this is jinja syntax to fill in the variable with its value. When the template is rendered, it will display “Hello, Jane!” to the end user.
Routes
Last bits of general info before we dig in to this specific app - let’s discuss how the user will move from page to page, and how the application knows what to render next.
Flask provides “routing” functionality, which means you, as you’re building the site, can specify what function runs, given certain behavior from the end user. This sounds vague, so let’s illustrate by expanding on our example from Templates, where we had the say_hello() function.
from flask import render_template

@app.route('/')
def index():
    return render_template('index.html')

@app.route('/greeting')
def say_hello():
    return render_template('greeting.html', name="Jane")
The new line, @app.route('...'), specifies to flask that the function should be run when the user accesses that route. For example, if the user accesses the root of the website URL (example.com/), then index() will be called and index.html will be rendered. However, if the user accesses the /greeting route (example.com/greeting) then say_hello() will be called and greeting.html will be rendered, with the name parameter.
Methods
The last thing we need to cover before jumping in is methods - how a user accesses a specific route.
The two most common methods are GET and POST.
- GET is a request for information: you would send a GET request to view a webpage.
- POST is providing information: typically after filling out a form you send a POST request to deliver data to the server.
Let’s continue with our example.
from flask import request, redirect

@app.route('/greeting', methods=['GET', 'POST'])
def say_hello():
    if request.method=='GET':
        return render_template('greeting.html', name="Jane")
    elif request.method=='POST':
        field_value = request.form.get([FIELD])
        ...
        return redirect('/')
Here, we’ve told flask that the /greeting route can be accessed by two methods: both GET and POST. If the user sends a GET request, then the webpage will behave as before. However, the user now has an option to send a POST request, providing the server side with data. In say_hello() the input can be accessed, processed, or stored, then the user is redirected to the root (/) route.
Checklist specification
Now we’ve got a handle on what Flask does, let’s dive in to the actual implementation of our checklist web application!
A quick refresh on the functionalities we’d like to support:
- Supports multiple users via register/login/logout methods
- Displays upcoming tasks, organized by due date
- Allows users to mark tasks as complete
- Allows users to create/edit/delete tasks
- Supports recurring tasks
Database
In order to support multiple users, and to store users’ data between sessions, we’ll need a database.
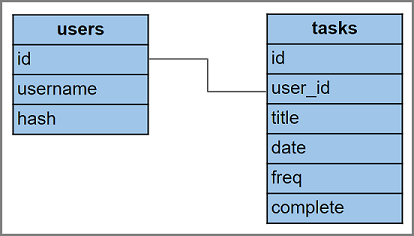
We’ll need just 2 tables for our goals:
- users: stores information about individual users, enables logging out/in
- id: unique number, representing the user
- username: unique username that user will use to log in
- hash: hashed password that will be used to verify user when logging in
- tasks: stores information about individual tasks, links tasks to users
- id: unique number, representing the task
- user_id: number referencing id field in users table
- title: description of the task
- date: due date
- freq: indicator of recurrence
- complete: flag to indicate task completion
As discussed earlier, I’ll be using sqlite3 to manage the database and all transactions. In appy.py, we need to create the database (if it doesn’t already exist), by executing schema.sql:
import sqlite3, os
from flask import g

def get_db():
    db = getattr(g, '_database', None)
    if db is None:
        db = g._database = sqlite3.connect(DATABASE)
        db.row_factory = sqlite3.Row
    return db

def init_db():
    with app.app_context():
        db = get_db()
        with app.open_resource('schema.sql', mode='r') as f:
            db.cursor().executescript(f.read())
        db.commit()

DATABASE = 'database.db'
if not os.path.isfile(DATABASE):
    init_db()
After the schemal is initialized, we have empty tables. For testing purposes, I’ve also created sampledata.sql, which (re)initializes a test user with a few example tasks. We’ll run it every time app.py runs.
def stage_sample_data():
    with app.app_context():
        db = get_db()
        with app.open_resource('sampledata.sql', mode='r') as f:
            db.cursor().executescript(f.read())
        db.commit()

# reset sample data every time
stage_sample_data()
Routes
Let’s walk through the different pages that a user can navigate through & use to submit information to our database. These will be displayed from the homepage, which depends on whether the user is logged in or not.
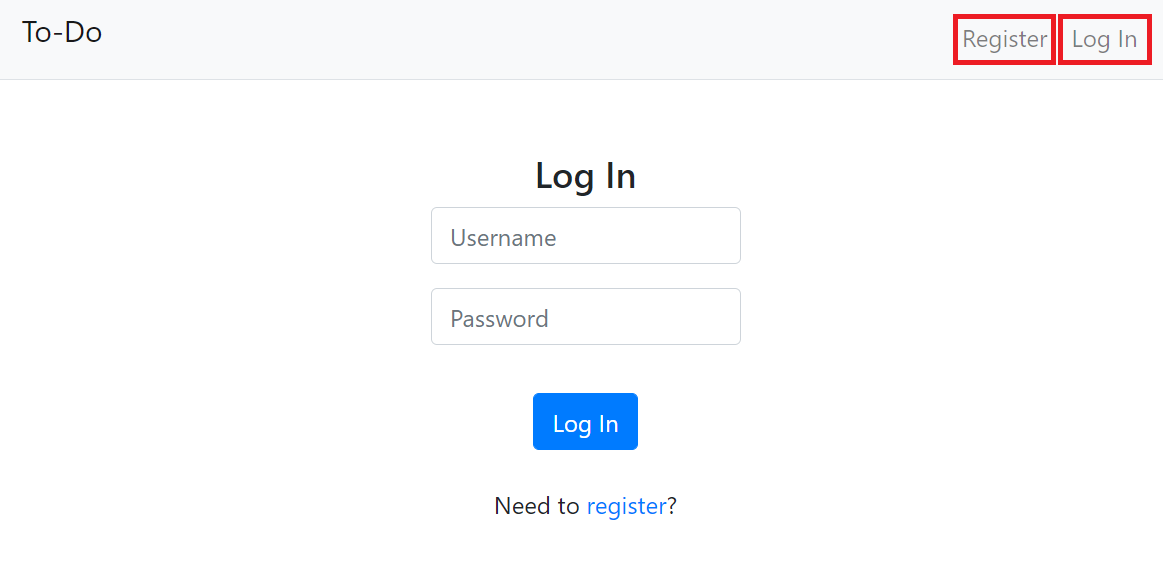
A user who is not logged in has two options: to log in or to register.
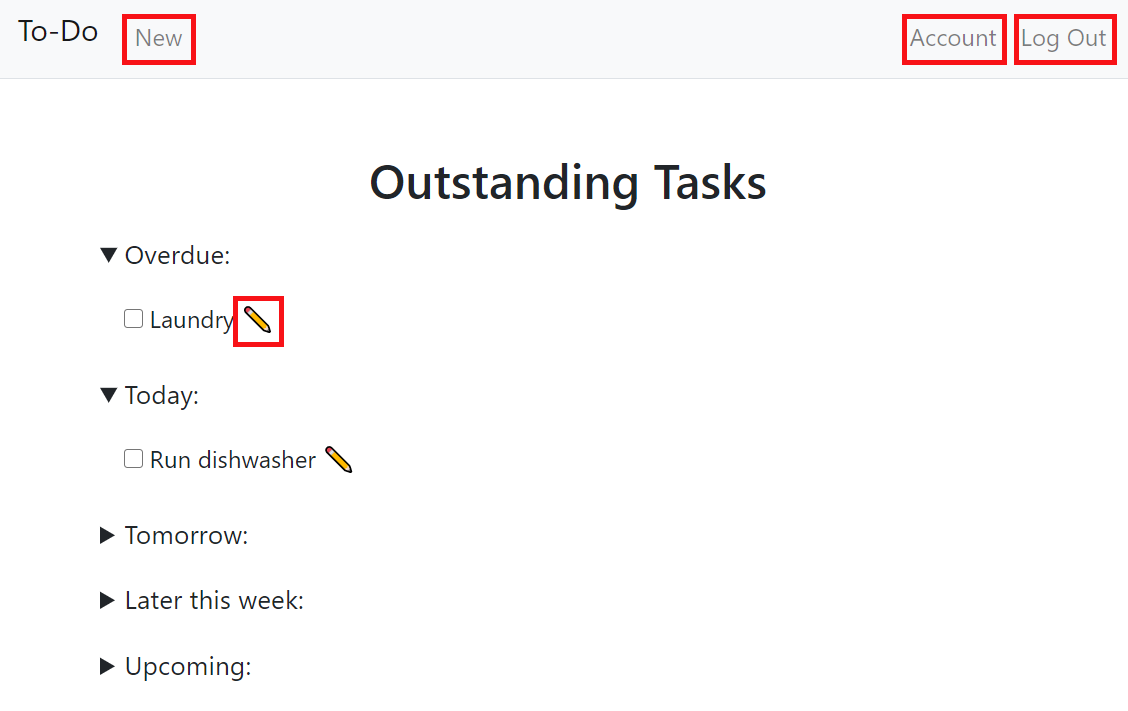
A user who is logged in has more options: to mark a task as complete, to create a new task, edit an existing task, to manage their account, or to log out.
Register
First off, any new user will need to be able to create an account. This route will be stored at /register, and it will allow users to GET the register page, which has a form to take a new username/password combination, then POST their information to create an account. We’ll also leverage a hash() function to transform the user’s password to be stored after obfuscation.
A GET request simply renders the register.html template, which is a form for a user to enter their desired username/password combination.
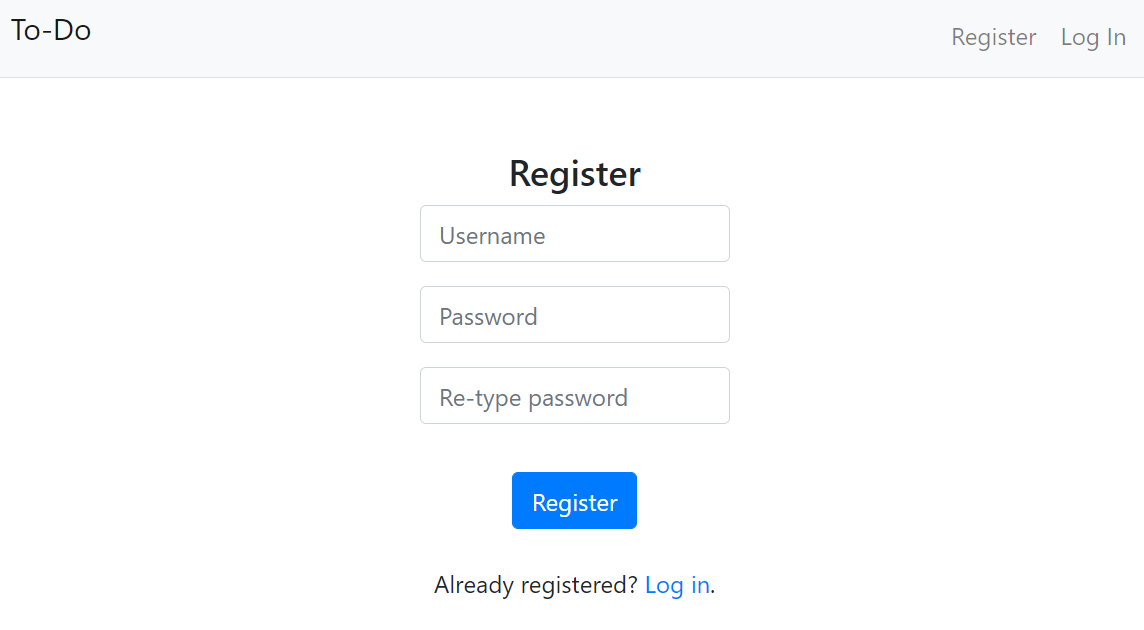
Submitting the form sends a POST request, that checks if the username is already in the users database, and if not creates a user associated with that username (and hashed password).
from flask import session
from flask_session import Session

# Configure application
app = Flask(__name__)

Session(app)

@app.route("/register", methods=["GET", "POST"])
def register():
    # Forget any user_id
    session.clear()

    # User submitted form
    if request.method == "POST":

        try:
            db = get_db()
            cur = db.cursor()

            rows = cur.execute('''select username from users where username = ?;''',
                            [request.form.get("username")]).fetchall()
            if len(rows)>0:
                flash('ERROR: invalid username')
                return redirect('/register')

            cur.execute('''INSERT INTO users (username,hash)
               VALUES (?,?)''', [request.form.get("username"), hash(request.form.get("password"))])

            db.commit()

            user_id = dict(cur.execute('''select id from users where username = ?;''',
                            [request.form.get("username")]).fetchall()[0])['id']

            session["user_id"] = user_id
            return redirect('/')
        except:
            return redirect('/login')

    else: #GET
        return render_template("register.html")
Note that we’re using the session class from Flask to store information about this specific user while they’re using our site. Setting session["user_id"] will allow the application to remember which user this is, anywhere they go on the site, and to query their data from the users table or tasks table.
Log in
The log in functionality will be very similar to the /register route - it will GET a form webpage, where the user can enter a username/password:
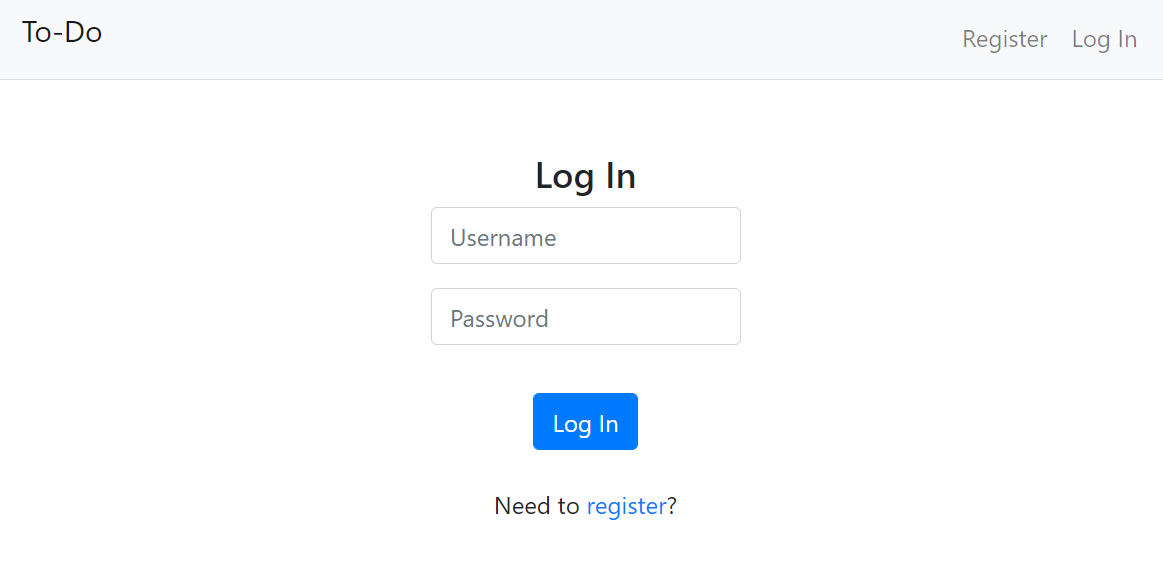
A POST request will send this form to the server, where the hashed password will be checked against that user’s hashed password from the users table. If the hashes match, then we log in the user by setting session["user_id"].
@app.route("/login", methods=["GET", "POST"])
def login():

    if request.method == "POST":

        try:
            db = get_db()
            cur = db.cursor()
            row = cur.execute('''select hash,id from users where username = ?;''',
                            [request.form.get("username")]).fetchall()[0]

            if row[0]!=hash(request.form.get("password")):
                flash('ERROR: invalid username/password combination')
                return redirect('/login')
            else:
                session["user_id"] = row[1]

            # Redirect user to home page
            return redirect('/')

        except:
            return redirect('/login')

    else: #GET
        return render_template("login.html")
Log out
The log out route is much simpler - there is no template or page to display. Simply upon sending a GET request to the /logout method, we clear the user’s session and redirect to the home page.
@app.route("/logout", methods=['GET'])
def logout():
    session.clear()
    return redirect('/')
Homepage
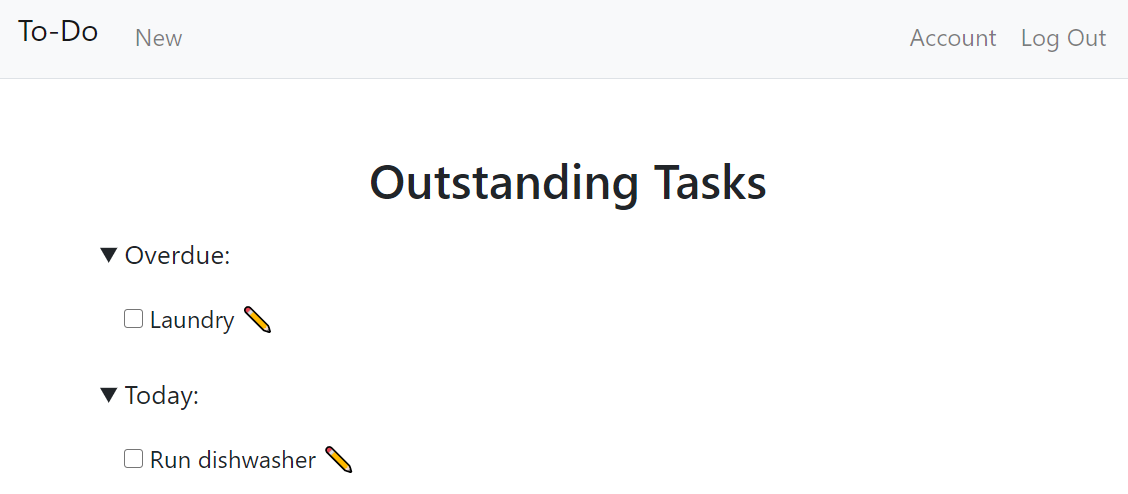
This route is designed to be the primary page users will spend time on - it’s where they can view tasks, ordered by due date, then check them off. All this will be hosted at the root / route.

In app.py, we’ll pass all the tasks to be displayed (where complete=0) in index.html:
@app.route("/", methods=['GET', 'POST'])
def index():
    ...
    if 'user_id' in session and request.method=='GET':
        db = get_db()
        cur = db.cursor()
        rows = [dict(row) for row in cur.execute('''select *, (julianday(date)-julianday('now')+1) as days_to_complete
                        from tasks
                        where user_id=? and complete=0
                        order by date asc;''',
                [session['user_id']]).fetchall()]
        return render_template('index.html', data=rows)
In index.html, this data will be displayed with each task getting its own checkbox.
<form action="/" method="POST">

{% if data|length > 0 %}
    {% for rows in data %}
        {% if rows|length > 0 %}
            ...

            <div class="offset">
            {% for entry in rows %}
                <input type="checkbox" id={{ entry.id }} name={{ entry.id }} onchange="this.form.submit()">
                <label for={{ entry.id }}> {{ entry.title }}</label>
                <a href="/edit/{{entry.id}}" title="Edit">✎</a>
                <br>
            {% endfor %}
            </div>

        {% endif %}
    {% endfor %}
{% endif %}
Note that the javascript onchange="this.form.submit()" included specifies that checking a single task off will POST the form. Server-side, we’ll handle the completion (and recurrence, if applicable).
Complete task
First, in app.py, we have to mark the task as complete. Note that due to our checkbox structure, we don’t know the field names to query with our ordinary syntax of request.form.get([FIELD NAME]). Instead, because we know the form will submit any time a checkbox changes, we can select any field name from request.form, knowing it will be a task ID that was altered by the form (we set this earlier where <input type="checkbox" id={{ entry.id }} name={{ entry.id }} onchange="this.form.submit()">).
In app.py:
@app.route("/", methods=['GET', 'POST'])
def index():
    ...
    db = get_db()
    cur = db.cursor()

    if request.method == "POST":
        if len(request.form)>0:
            cur.execute('''UPDATE tasks SET complete=(CASE WHEN complete=0 then 1 else 0 end) where id=?;''', [list(request.form)[0]])
            db.commit()
Recurrence
We’re not done though! Part of my specification for the application was to allow tasks to recur on various cadences.
As part of the design process, I decided to only populate the next task when the previous is completed. My logic was if a user is going to let a daily recurring task sit uncompleted, there’s no reason to stack recurrences on top of one another. Rather, I’ll prompt them that another is expected after the first is completed.
All that being said, after marking a task as complete we have to check if it is recurring, and append the next instance with the next due date to the tasks table in our database.
@app.route("/", methods=['GET', 'POST'])
def index():
    ...
    db = get_db()
    cur = db.cursor()
    row = dict(cur.execute('''select *, case when freq=1 then date(date,'+1 days')
                                                        when freq=2 then date(date,'+7 days')
                                                        when freq=3 then date(date,'+1 months')
                                                        when freq=4 then date(date,'+1 years')
                                                        end as next_date
                        from tasks
                        where id=? and freq>0;''',
            [list(request.form)[0]]).fetchall()[0])

    cur.execute('''INSERT INTO tasks (user_id,title,date,freq) values (?,?,?,?);''',
            [row['user_id'], row['title'], row['next_date'], row['freq']])
    db.commit()
Note that I have manually selected and hard-coded the frequency options - users will be unable to specify “repeat every X days/weeks”. This is due to my choice of a drop-down menu on the /new and /edit routes, limiting users to a specific range of choices for recurrence (None, daily, weekly, monthly, and yearly).
New task
THe /new route will also append to the tasks table, but without copying. A logged in user can create a new task with an entirely new specification via the following form: 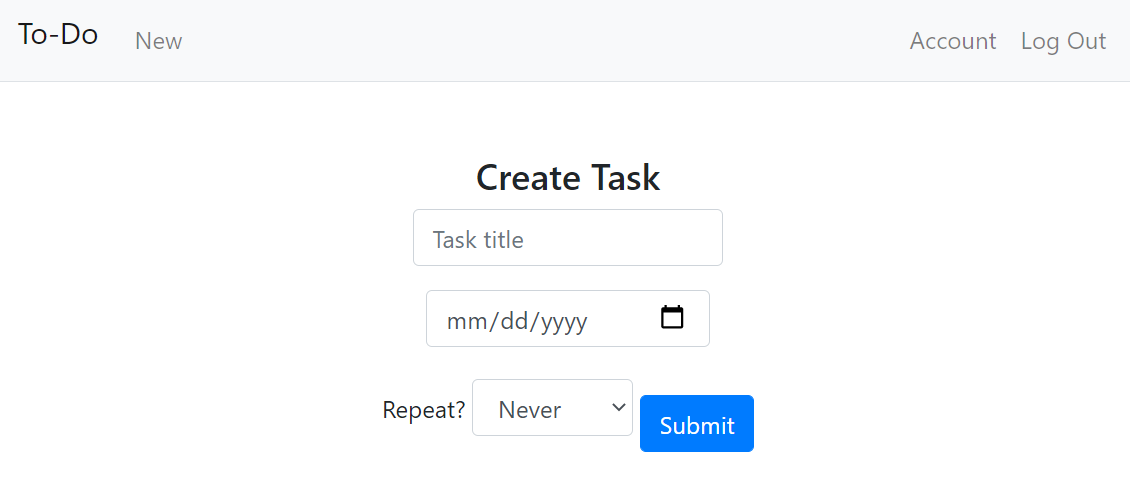 And a POST request submits the form to add the new task to the tasks table.
@app.route("/new", methods=["GET", "POST"])
def new():
    if request.method == "POST":

        # add data to database
        db = get_db()
        cur = db.cursor()

        cur.execute('''INSERT INTO tasks (user_id,title,date,freq)
           VALUES (?,?,?,?)''', [session['user_id'], request.form.get("title"), request.form.get("date"),
                        request.form.get("dropdown")])

        db.commit()

        return redirect('/')

    else: # GET
        if 'user_id' in session:
            return render_template('new.html')
        else:
            return redirect('/')
Edit task
The /edit route is a little different - it allows a user to update information about a specific task in tasks. However, to specify the task in question, we’ll pass the task ID as a parameter in the GET and POST request. Flask syntax allows us to specify in the route /edit/
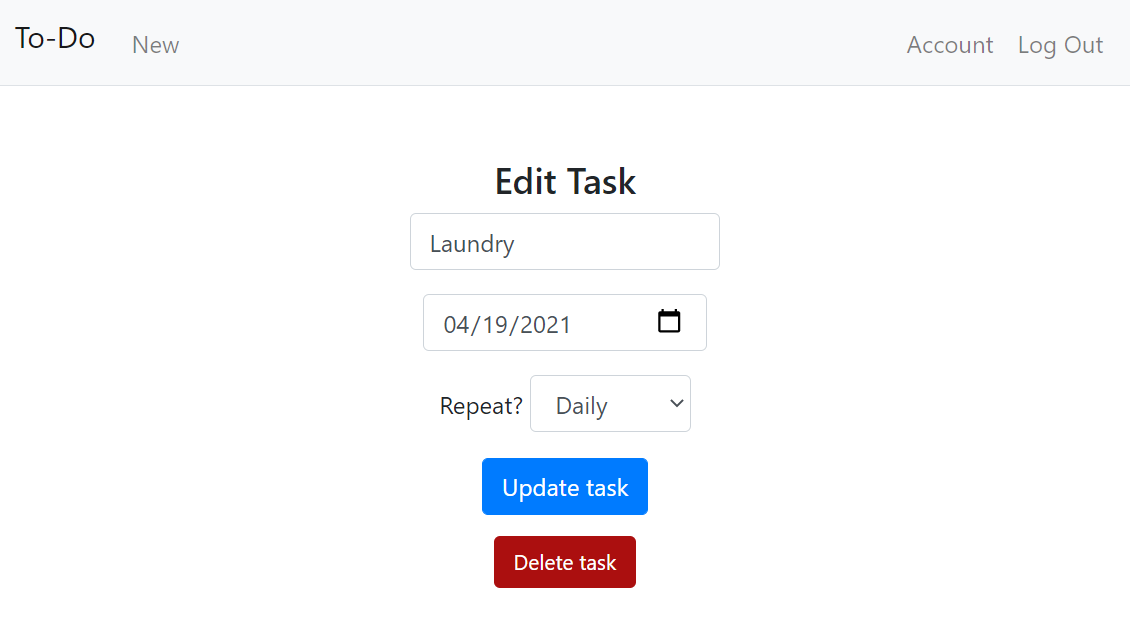 Submitting the form with updates will send the POST request, that the server will use to update the task.
@app.route("/edit/<task_id>", methods=['GET', 'POST'])
def edit(task_id):

    if request.method == "POST":
        if 'delete' in request.form:
            db = get_db()
            cur = db.cursor()

            cur.execute('''DELETE from tasks where user_id = ? and id=?;''',
                        [session['user_id'], task_id])
            db.commit()
            return redirect('/')
        else:
            db = get_db()
            cur = db.cursor()

            cur.execute('''UPDATE tasks
                            set title=?,
                                date=?,
                                freq=?
                            where user_id=? and id=?;''',
                        [request.form.get("title"), request.form.get("date"), request.form.get("dropdown"),
                                session['user_id'], task_id])
            db.commit()
            return redirect('/')

    else: #GET
        db = get_db()
        cur = db.cursor()

        # make sure current task & user_id are valid
        try:
            row = dict(cur.execute('''select *
                            from tasks
                            where user_id=? and id=? and complete=0;''',
                [session['user_id'], task_id]).fetchall()[0])
        except IndexError:
            return redirect('/')

        return render_template('edit.html', task_id=task_id, title=row['title'], due_date=row['date'], repeat=row['freq'])
Note that we’ve also added a new button: the delete button. When this is submitted, the entire task will be cleared out of the database, and so no recurrences will occur.
Manage account
The /account route is much the same as the /edit route - it allows a user to edit an existing record in the database. The GET request displays the form:

POSTing the form will check the user’s password hash against the stored database hash, and allow the user to update their password if the two match. Additionally, like we implemented with /edit/
@app.route("/account", methods=["GET", "POST"])
def account():

    # User submitted form
    if request.method == "POST":

        try:
            if 'delete' in request.form:

                db = get_db()
                cur = db.cursor()

                result = dict(cur.execute('''select hash from users where id = ?;''',
                                [session['user_id']]).fetchall()[0])

                if result['hash']!=hash(request.form.get("current")):
                    flash('ERROR: invalid password')
                    return redirect('/account')
                else:
                    cur.execute('''DELETE from tasks where user_id = ?;''',
                                [session['user_id']])
                    cur.execute('''DELETE from users where id = ?;''', [session['user_id']])
                    db.commit()
                    del session['user_id']

                return redirect('/')
            else:

                if request.form.get("new")!=request.form.get("new2"):
                    flash('ERROR: new password & confirmation must match')
                    return redirect('/account')

                db = get_db()
                cur = db.cursor()

                result = dict(cur.execute('''select hash from users where id = ?;''',
                                [session['user_id']]).fetchall()[0])

                if result['hash']!=hash(request.form.get("current")):
                    return redirect('/account')
                else:
                    cur.execute('''update users set hash=? where id=?;''', [hash(request.form.get("new")),session['user_id']])
                    db.commit()

                return redirect('/')
        except:
            return redirect('/account')

    else: #GET
        if 'user_id' in session:
            return render_template('account.html')
        else:
            return redirect('/')
Data validation
The app is now complete! We have routes to accomplish everything in our original specification. However, before wrapping up this post I want to address a few forms of data validation I implemented, to ensure a more streamlined user experience.
Client side
By “client side,” I mean checks that are handled by the site itself, without making a call back to the server. I implemented 2 types of these checks: the first, required fields, and the second, confirmation pop-ups.
Required fields
Required fields are an HTML option when creating a form. When a field is specified as “required”, the webpage will not allow users to submit the form without any data entered in the field in question.
For example, in login.html, we can specify that the username field should be required:
<div class="form-group">
    <input class="form-control" name="username" placeholder="Username" type="text" required>
</div>
The user will then receive a small notification when clicking “submit,” notifying them of the required field. 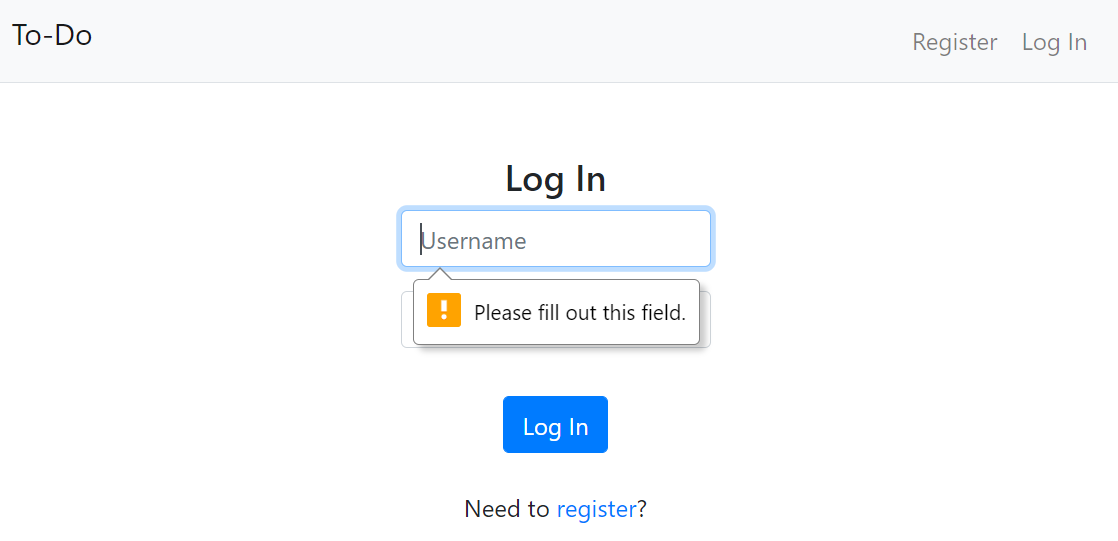
Confirmation pop-ups
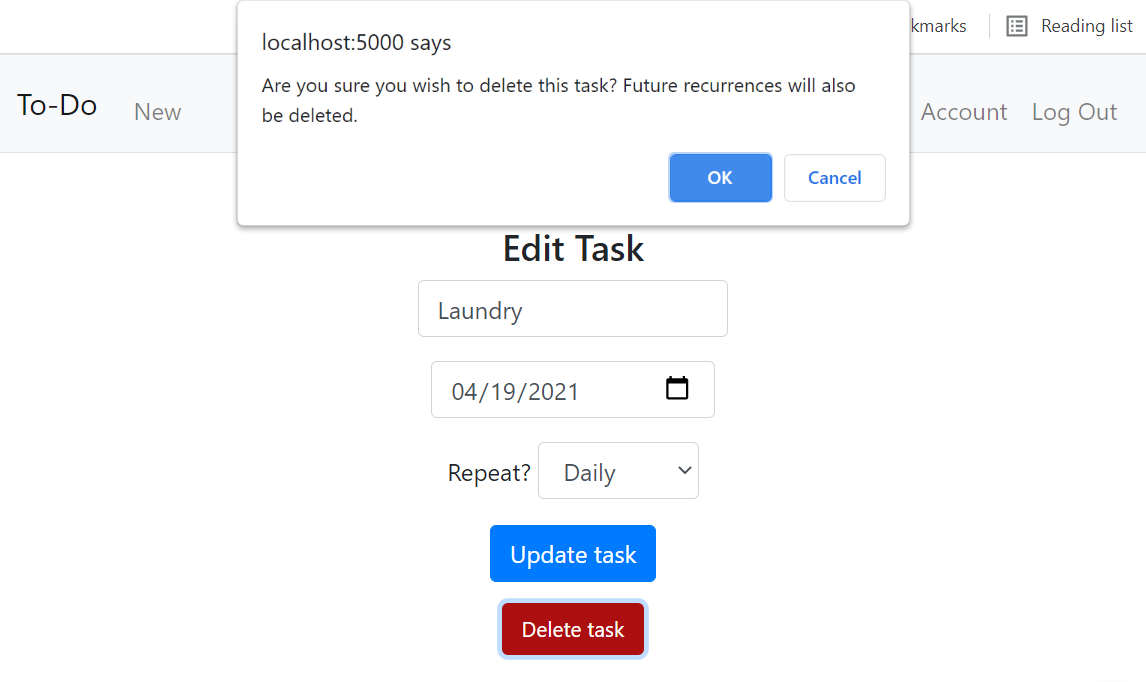
We can also embed a short piece of Javascript code inside our forms, requiring users to confirm specific actions by clicking through a pop-up notification.
For example, in edit.html we can require a user to confirm when they click on the Delete task button.:
<div class="form-group">
    <button class="btn btn-delete" name="delete" type="submit" onClick="return confirm('Are you sure you wish to delete this task? Future recurrences will also be deleted.');">Delete task</button>
</div>
Notice we specify what message is displayed in the pop-up inline with the form HTML. If the user confirms, the form is submitted as normal, but if they hit cancel on the pop-up, then the form submission is cancelled as well.
Server side
Server side checks happens after a request has been sent, and can be used to influence the next page that is displayed.
For example, while registering a user might select a username that is already in use. Nothing on the client side prevents them from submitting the form with this data - it’s up to the server to determine the data is invalid and request they update and re-submit their /register POST request.
To handle these edge cases, I used Flask’s flask functionality, that allows you to send additional data along with a redirect.
from flask import flash, get_flashed_messages

@app.route("/register", methods=["GET", "POST"])
def register():
    ...

    db = get_db()
    cur = db.cursor()

    rows = cur.execute('''select username from users where username = ?;''',
                    [request.form.get("username")]).fetchall()
    if len(rows)>0:
        flash('ERROR: invalid username')
        return redirect('/register')
This code snippet checks whether the username a user submitted during a POST /register request is already in use, then calls flash() with an error message before redirecting the user.
Returning to Jinja2 syntax, as we mentioned earlier, we can access these flashed messages in our templates and display them however we choose. In this case, I want to display them as closeable divs at the top of each web page’s body.
{% with messages = get_flashed_messages() %}
{% if messages %}
<div class=flashes>
{% for message in messages %}
<span class="closebtn" onclick="this.parentElement.style.display='none';">×</span>
{{ message }}
{% endfor %}
</div>
{% endif %}
{% endwith %}
After some CSS, this is displayed to the user: 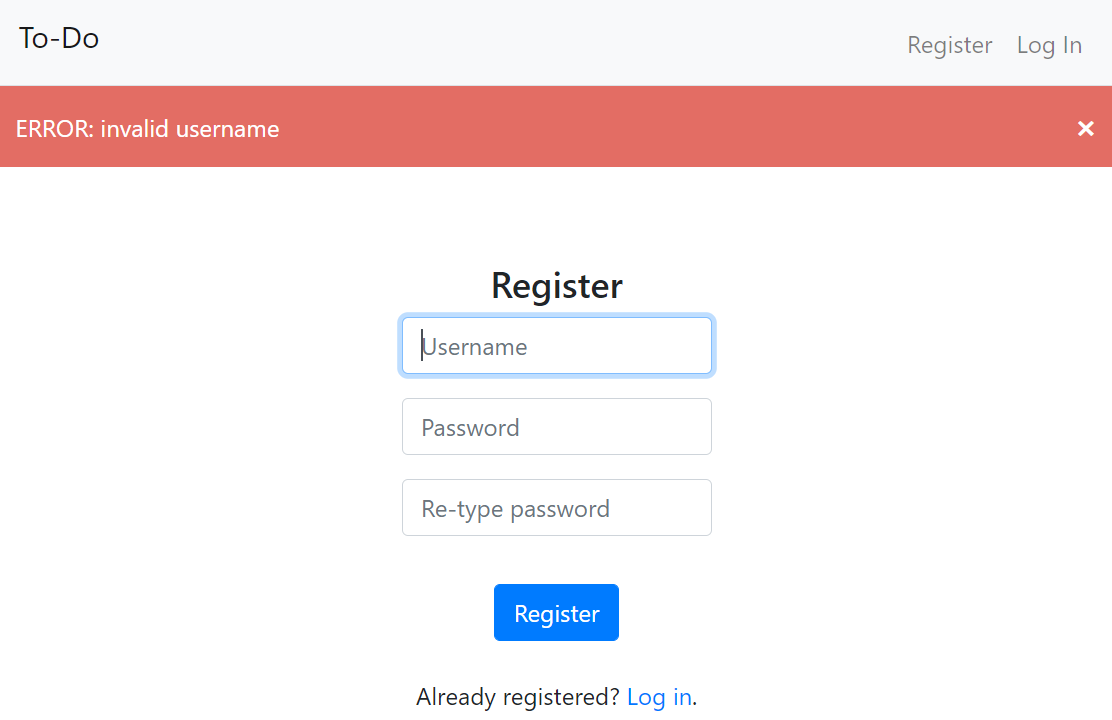 Now, they’re notified what went wrong, but didn’t need to be redirected to an entirely new route for displaying errors, such as a 500 page.
Code
That’s it! The full code is available in my GitHub repository.
sampledata.sql automatically stages tasks and information for user:test with password:test.
The application can be run locally by cloning the repository, and entering flask run in the terminal.